How a Hail Damage Roof Insurance Claim Works in Alberta
Airdrie sits in the heart of Alberta's Hailstorm Alley, so most local homeowners will deal with roof hail damage at some point. A hail damage roof insurance claim in Alberta is the process of proving that a storm damaged your roof, agreeing with your insurer on what it will cost to repair or replace, and getting that work done properly.
The good news is that the process is more in your favour than many people assume. In Alberta you, the homeowner, choose your own contractor. The insurance company cannot force you to use a particular roofer. Your job is to document the damage, communicate clearly with your insurer, and make sure the repair meets current building code. This guide walks through each step in plain language. None of it is legal advice, so always confirm the details with your insurer or broker.
Throughout the claim, two parties drive the outcome: the insurance adjuster, who assesses the loss for your insurer, and your contractor, who assesses what the roof actually needs. When those two work from the same evidence, claims tend to go smoothly.
Step 1: Spot the Hail Damage Before It Spreads
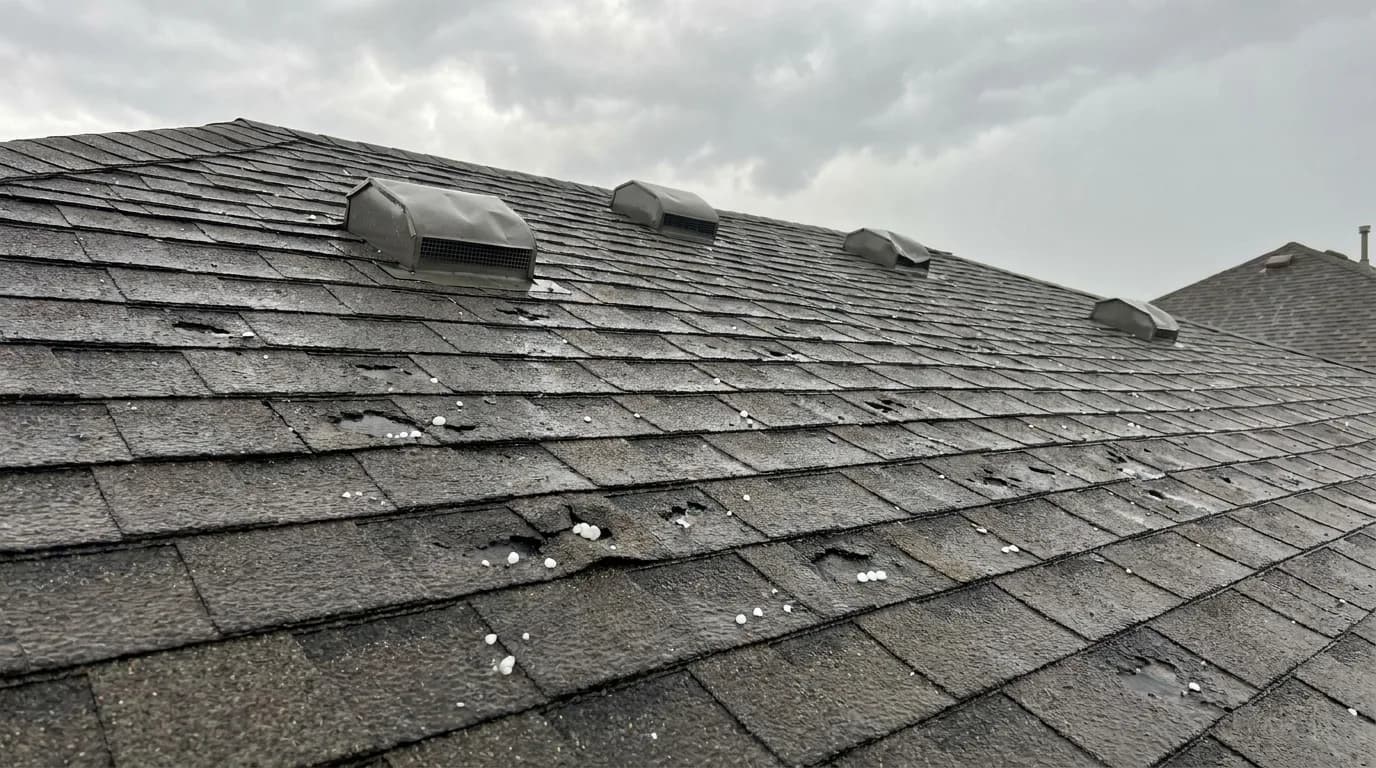
Hail damage is often invisible from the ground, which is why so many Airdrie roofs go unclaimed until leaks appear. On asphalt shingles, look for granule loss: the gritty surface coating washing into gutters and downspouts, leaving dark, soft spots where the mat underneath is exposed. You may also see bruising, which are round dents that feel soft or spongy when pressed, like a bruise on fruit.
The easiest confirmation is on the soft metal around your roof. Check vents, flashing, gutters, eavestroughs, and especially aluminium fascia for small round dents. If hail dented your soft metal, it almost certainly affected your shingles too. Window screens, garage doors, and the top of an air conditioner unit are also good tell-tale surfaces.
Do not climb onto your roof to inspect it yourself. It is unsafe and you can do more harm than good. Note the date of the storm if you remember it, take photos of any obvious damage from the ground, and move on to a professional inspection.
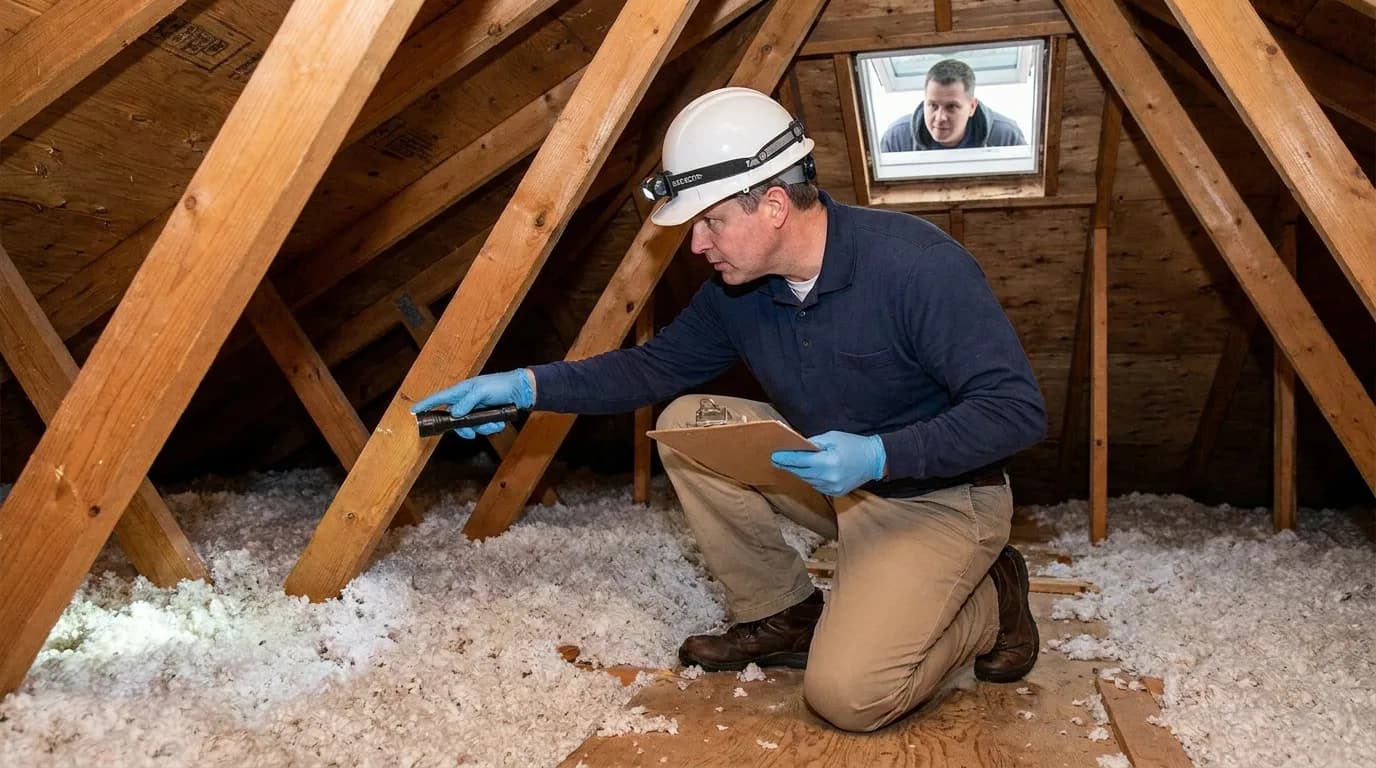
Step 2: Get a Free Documented Roof Inspection
Before you call your insurer, book a free roof inspection with a local roofing contractor. A proper inspection does more than confirm damage exists. It produces the evidence your claim depends on: dated photographs of bruising and granule loss, a chalk-marked test square showing hail-strike density per area, and notes on collateral damage to vents, flashing, and metal.
This matters because the insurance adjuster will spend limited time on your roof. A contractor's documentation gives you a clear, independent record to compare against the adjuster's findings. If a storm clearly hit your neighbourhood, an inspection helps establish that your roof was part of the same event.
Choose a contractor who will give you an honest answer, including telling you when there is not enough damage to justify a claim. Filing a claim that gets denied can still count against you, so you want a roofer who only recommends a claim when the damage genuinely warrants one.
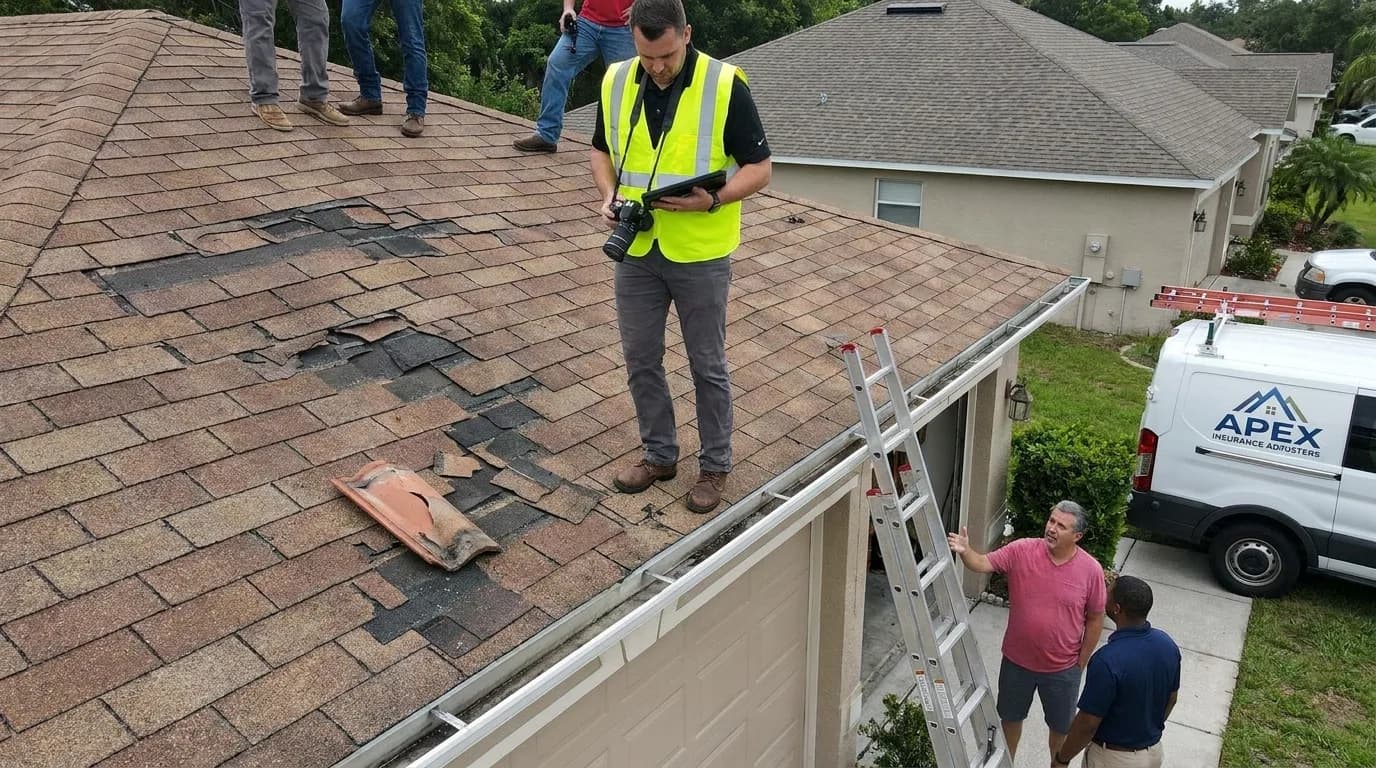
Step 3: Report the Loss and Meet the Adjuster
Once you have evidence of genuine damage, report the loss to your insurer. Timing matters here. Many insurers require hail claims to be filed within roughly twelve months of the storm, but the exact window varies by policy, so check your wording or ask your broker rather than assuming. Reporting promptly also strengthens the link between the storm and the damage.
Your insurer will assign an adjuster to inspect the roof and prepare a scope of loss, which is the itemised list of everything the insurer agrees to pay for. Ask your contractor to be present, or at least to share their documentation, so the adjuster sees the full picture. The scope should cover the shingles, underlayment, flashing, vents, and any damaged eavestroughs or fascia.
Read the scope of loss carefully. This single document determines your payout, so it is worth comparing line by line against your contractor's estimate. Gaps between the two are normal and usually resolvable, which is the subject of the next steps.
Step 4: Understand ACV vs RCV, Depreciation, and Your Deductible
Most Alberta home policies pay roof claims on a replacement cost value (RCV) basis, but they release the money in two stages. First the insurer pays the actual cash value (ACV), which is the replacement cost minus depreciation for the age and wear of your old roof. Then, after the work is finished and invoiced, they release the held-back depreciation, often called the RCV holdback or recoverable depreciation.
In practice this means the first cheque is smaller than the total approved amount. You do not lose that depreciation, but you only recover it once the roof is actually replaced and your contractor submits the final invoice. Some homeowners are caught off guard by this and assume the claim was underpaid when it was simply paid in stages.
Your deductible comes off the total. So your out-of-pocket cost is generally your deductible, assuming the RCV covers the full replacement. Confirm with your insurer whether your policy is RCV or ACV-only, because an older roof on an ACV-only policy can leave a much larger gap to cover yourself.
Step 5: Don't Forget Code-Required Items the Scope May Miss
Adjusters work from standard templates, and those templates sometimes miss items that current building code requires on a re-roof. In Alberta's freeze-thaw and Chinook climate, these items are not optional extras: they are what stops your new roof from leaking. Common omissions include ice-and-water shield along eaves and in valleys, proper drip edge metal at the edges, and adequate attic ventilation.
When a code-required item is missing from the scope of loss, your contractor can request a supplement, which is a documented addition to the claim with the code reference and the reason. Insurers routinely approve legitimate code items when they are properly justified. This is another reason to have a knowledgeable local contractor involved early.
Skipping these items to save the insurer money does not save you anything. It leaves you with a roof that fails sooner, so it is worth making sure the final scope reflects a proper, code-compliant installation.
Step 6: If the Claim Is Denied or Only Partly Approved
Not every claim is approved in full on the first pass. If your hail damage roof insurance claim is denied or only partly approved, you have options. Start by asking the insurer for the denial in writing, with the specific reasons. Often a denial comes down to the adjuster seeing less damage than was actually there, which your contractor's documentation can address.
You can request a re-inspection, supply additional photographs and test-square evidence, and have your contractor walk the adjuster through the findings. If you and the insurer still disagree on the amount, Alberta policies typically include an appraisal clause, a formal process where each side appoints an appraiser to settle the dispute. Your broker can explain how it applies to your policy.
Because hail damage tends to worsen over an Alberta winter, with freeze-thaw cycles opening up small bruises into leaks, it pays to resolve a disputed claim before the cold sets in rather than after. A documented, code-compliant claim handled by a contractor you trust is the surest way to a fair outcome.
What Your Home Insurance Actually Covers on a Roof
Most Alberta home policies treat hail and wind as named perils, which is why a hail damage roof insurance claim is usually viable when the damage is genuine and documented. What insurers generally do not cover is wear and tear: a roof that has simply reached the end of its life from age, UV, and neglect is a maintenance issue, not a sudden loss. This is the line adjusters are trained to look for, and it is why fresh, dated evidence tied to a specific storm matters so much.
A few policy details are worth checking before you file. Some insurers apply a separate, higher deductible for hail or weather claims, so confirm yours. Some older roofs are insured on an actual cash value basis rather than replacement cost, which caps the payout at the depreciated value. And a handful of policies exclude purely cosmetic damage, meaning dents that do not threaten the roof's function. None of these should stop you claiming real storm damage, but knowing where you stand keeps the process free of nasty surprises, and your broker can confirm the specifics in minutes.
Common Mistakes That Get a Hail Claim Denied or Underpaid
The same avoidable errors sink claims again and again. Waiting too long is the big one: damage that was obvious in July becomes ambiguous by spring once a winter of freeze-thaw has rounded the edges of every bruise, and you may also slip past your policy's filing window. Climbing up to inspect the roof yourself is another, both because it is dangerous and because foot traffic can create marks that muddy the evidence. And signing with a storm-chasing contractor who knocks on your door after a big cell, often from out of province, can leave you with a poor repair and no one to call when it leaks.
On the paperwork side, the costly mistake is accepting the first scope of loss without comparing it to an independent estimate. Initial scopes routinely miss code-required items like ice-and-water shield, drip edge, and proper ventilation, and a roof rebuilt without them fails early. Take photographs the day you notice damage, keep every document and email in one place, get a free independent inspection, and let your contractor reconcile the scope line by line. Doing those four things is what separates a fully approved replacement from a token cheque.